One of the major differences between Suitelets and RESTlets is that the latter supports authentication, which makes it easier to restrict access in RESTlets. As you know, NetSuite provides two methods for authentication, OAuth or the NetSuite-specific NLAuth in the HTTP Authorization header. In this post, we’ll take a closer look at both these authentication methods.

NLAuth
Using the NLAuth method is really easy. All you need to do is pass the following details to the HTTP Authorization Header of your request:
- nlauth_account (required) – NetSuite company ID
- nlauth_email (required) – NetSuite user name
- nlauth_signature (required) – NetSuite password
- nlauth_role (optional) – internal ID of the role used to log in to NetSuite
A sample authorization header using the NLAuth method would look like the following:
Authorization: NLAuth nlauth_account=123456, [email protected], nlauth_signature=xxxxxxxx, nlauth_role=41
Issue with NLAuth
Although using the NLAuth authentication method is relatively easy as compared to OAuth method, it does have a few limitations. One of them being that it is highly sensitive to password rotation policies. For example, you will need to update the password in your scripts if you have changed your NetSuite account password after it has expired. Moreover, if you have used same credentials for multiple authentications, then you will have manually update the password for each script. Issues like these significantly increase the overhead involved when using this method.
Another major flaw with using the NLAuth method is that it sends your NetSuite account password in plain text in the request header. So if a hacker is listening and monitoring your traffic, then your NetSuite account can be easily compromised.

How does OAuth take care of these problem?
OAuth uses a token (which is generated prior to using that token in the request) to validate the user. This token is not impacted by password expiry. Furthermore, if a hacker is monitoring your communication with the server, only your account’s token will be compromised, not your password. So your account will remain safe from the hacker. You can easily remove the token from your account and generate a new one.
An OAuth Authentication header typically has the following details (since OAuth passes the following parameters).
- oauth_signature (required) – Credentials to verify the authenticity of the request, generated by calling your application. The Token Secret and Consumer Secret are constructed as a key to sign the request, using a supported signature method (HMAC-SHA1 or HMAC-SHA256).
- oauth_version (optional) – Must be set to “1.0”.
- oauth_nonce (required) – Passes a unique, random, alphanumeric string. This string must be a minimum of 6 characters (the maximum length is 64 characters). It is used to verify that a request has never been made before.
- oauth_signature_method (required) – Must be set to HMAC-SHA1 or HMAC-SHA256. Declares which signature method is used.
- oauth_consumer_key (required) – Consumer Key (client application ID) generated for the token-based application in NetSuite. The unique value is matched to the token, to establish ownership of the token.
- oauth_token (required) – Token ID generated for the token-based application in NetSuite.
- oauth_timestamp (required) – Passes in a positive integer expressed as the number of seconds since January 1, 1970 GMT.
- realm (required) – NetSuite company ID

Enabling Token based authentication feature
To enable the token-based authentication feature using OAuth, just follow the steps below.
- Go to Setup > Company > Setup Tasks > Enable Features
- Click on the SuiteCloud subtab.
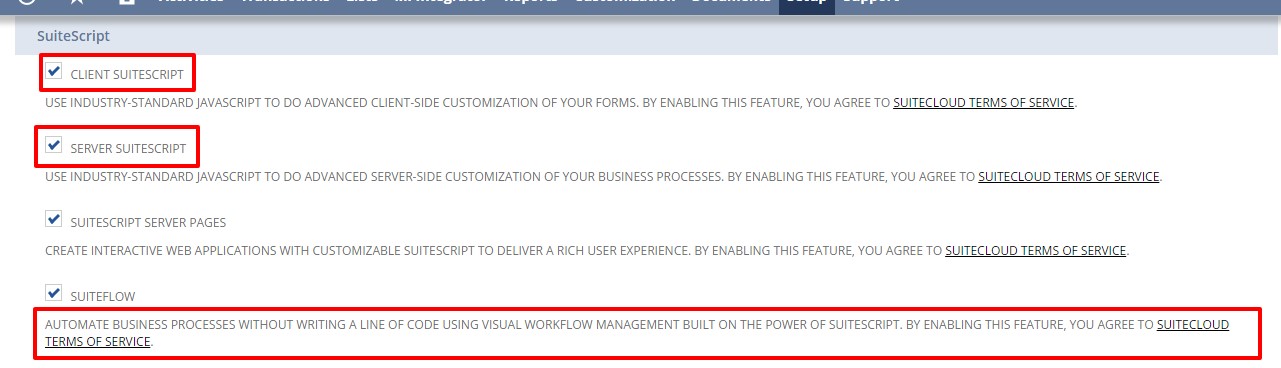
- Scroll down to the SuiteScript section, and check the following boxes.
- Client SuiteScript.
- Server SuiteScript. Click “I Agree” on the SuiteCloud Terms of Service page.
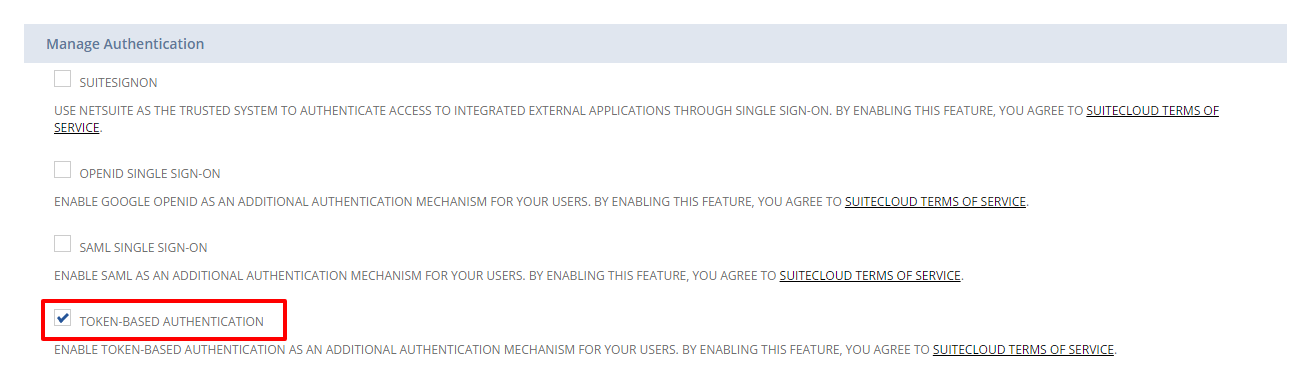
4. Scroll down to the Manage Authentication section, and check the Token-based Authentication box. Click I Agree on the SuiteCloud Terms of Service page.
5. Click Save Button.
And that’s it. In my next post, I’ll show you how to assign a user to token based authentication roles, how to create an application using the integration record, and how to call a token endpoint to issue and revoke a token.