The NetSuite AI Connector Service is a powerful, protocol-driven integration built on the open Model Context Protocol (MCP). This connector allows you to securely connect your preferred AI model (such as Claude AI) with NetSuite without vendor lock-in. This gives you the flexibility to choose the AI solution that aligns perfectly with your business needs.
Important: Before proceeding with the setup, we strongly recommend that you review NetSuite’s official guidance on Associated Risks, Controls, and Mitigation Strategies to understand compliance and implementation.
Prerequisites
- NetSuite account with Administrator access
- Claude AI Pro Plan (this subscription is required for custom connectors)
- Basic understanding of NetSuite roles and permissions
- Enable OAuth 2.0 features in the Enable Features settings
Step 1: Access Your NetSuite Account
- For the initial setup and SuiteApp installation, log in to NetSuite using an account with Administrator role privileges.
- This setup is compatible with both Sandbox and Production environments.
Step 2: Install the MCP Tools SuiteApp
Installation Process
- Navigate to the SuiteApp Marketplace: Customization → SuiteCloud Development → SuiteApp Marketplace.

2. Search for MCP Sample Tools in the search bar.
3. Select the MCP Sample Tools application from the search results.
4. Click the Install button located in the top-right corner of the SuiteApp details page.
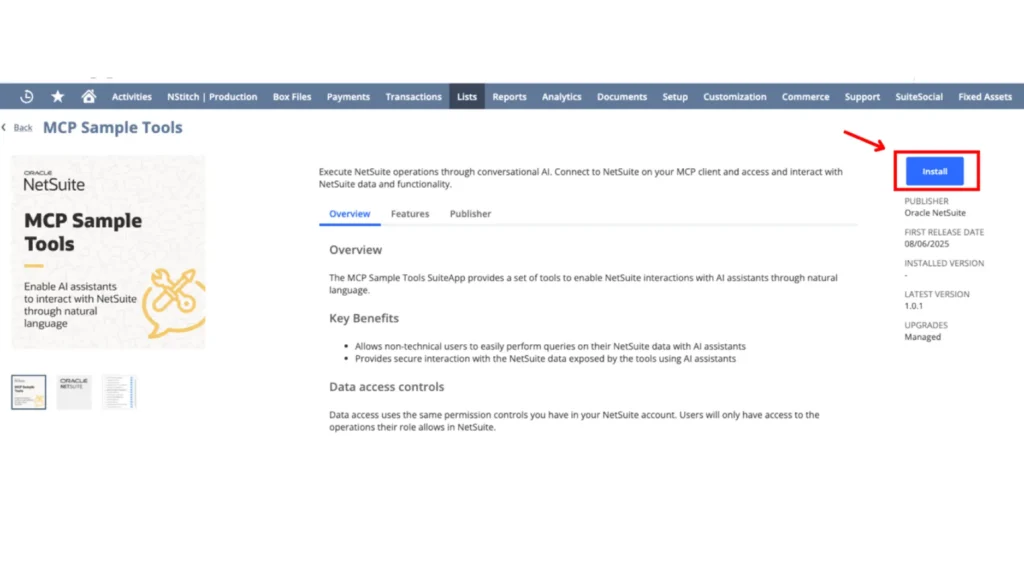
Monitor the installation progress and wait for completion.

Post-Installation Resources
Once installation is complete, you can use the sample utilities available in the NetSuite MCP Sample Tools GitHub repository to expose and configure the tools according to your requirements.
Step 3: Post-Installation Configuration
1. NetSuite Sample Tools (Deprecated)
This was the original SuiteApp designed for testing and interacting with MCP Tools. It is no longer available in the SuiteApp Marketplace.
However, developers can still replicate its capabilities by manually configuring MCP endpoints, defining custom roles, and granting the appropriate permissions within NetSuite.
For detailed guidance, refer to the Official NetSuite MCP Sample Tools and our companion guide on Developing Custom Tools.
2. NetSuite Standard Tools (Recommended)
This is the officially supported and actively maintained SuiteApp that connects NetSuite with MCP-enabled AI services such as ChatGPT.
It provides a streamlined setup, enhanced security, and built-in access to essential NetSuite operations — making it the preferred choice for new MCP implementations.
Key Considerations
- MCP Client Connection: Use the NetSuite AI Connector to establish the link between your AI service and MCP Tools
- Troubleshooting Installation Issues: If the installation fails, the MCP client will display an empty tools list
- Permission Requirements: Even after successful installation, insufficient role permissions may result in no visible tools
- For Reference: Docs.Oracle
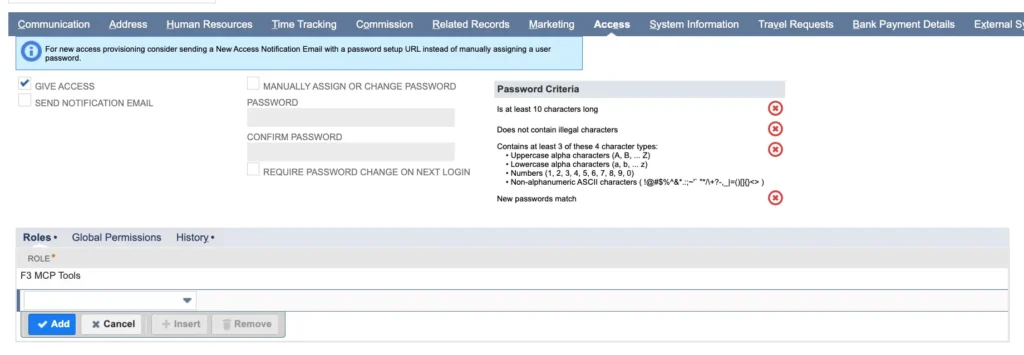
Step 4: Create a Custom MCP Role
Important Note: Administrators cannot work directly with MCP tools. You must create a dedicated custom role for MCP operations.
Role Creation Process
- Create the Custom Role
- Navigate to role management in NetSuite.
- Create a new custom role specifically for MCP operations
- Any Center Type can be selected
- For best usage, select “Accessible Subsidiaries -> All” and “Allow Cross-Subsidiary Record Viewing”

The table below outlines the minimum permissions necessary to access the tools within Claude AI.
| Permissions | ||
|---|---|---|
| TAB | PERMISSION | LEVEL |
| Transactions | Find Transaction | View |
| Transactions | Invoice | View |
| Transactions | Sales Order | View |
| Reports | Financial Statements | View |
| Reports | Sales Order Reports | View |
| Lists | Contacts | Full |
| Lists | Customers | View |
| Lists | Employee Record | View |
| Lists | Employees | View |
| Lists | Financial History | View |
| Lists | Items | View |
| Setup | Log In Using OAuth 2.0 Access Tokens | Full |
| Setup | MCP Server Connection | Full |
Update on Permissions for NetSuite AI Connector Setup
Please note that with the latest update from MCP, two new permissions are required for the NetSuite AI Connector.
| List | Perform Search | Full |
| Setup | Rest Web Services | Full |
The 13 MCP Tools necessitate that specific, minimal permissions be configured for the roles. Screenshots for each table are provided below.


2. User Assignment Strategy
While creating separate users is a good practice, it’s not enforced by NetSuite. You have flexible options for role assignment:
- Dedicated Users: Create separate users for Administrator and MCP operations (Good for production environments)
- Multi-Role Assignment: Use existing users (such as Admin) and assign them additional roles. If a user already has a custom role assigned, you can add MCP-related permissions to that existing role.
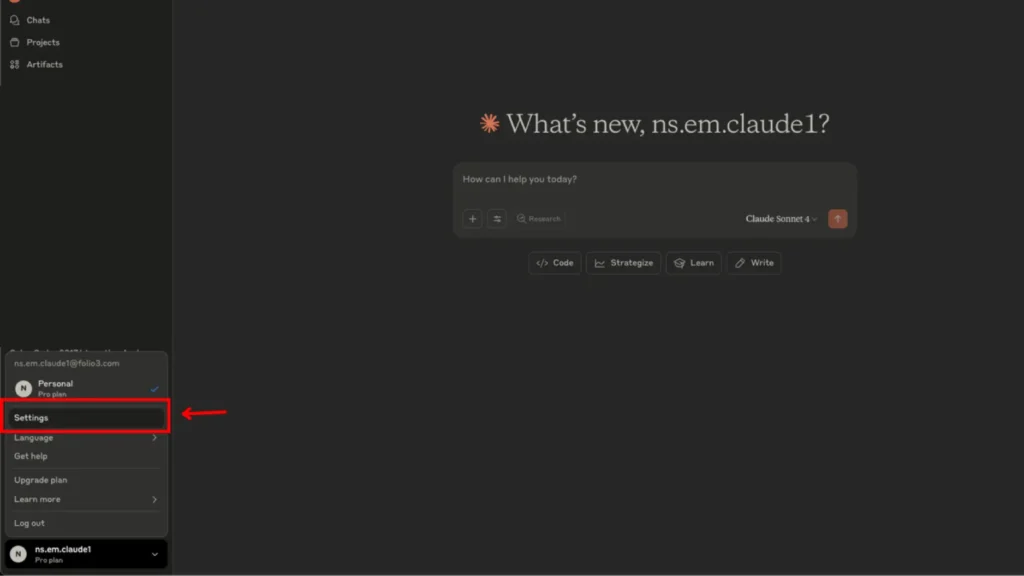
Step 5: Configure Claude AI Integration
Prerequisites Verification
- Visit Claude AI
- Ensure you have an active Pro Plan subscription (required for custom connectors)
Integration Setup Process
Step 1: Access Settings
- Navigate to your Claude AI profile
- Select the Settings option
Step 2: Add Custom Connector
- Locate the Custom Connector section
- Click “Add Custom Connector”

Step 3: Configure Connection Details
- Name: Enter a descriptive name for your connector (you may include an identifier for easier management)
- URL: Construct the endpoint URL using the following format: “https://<YOUR_ACCOUNT_ID>.suitetalk.api.netsuite.com/services/mcp/v1/all”

Step 4: Establish Connection
- Click the “Connect” button to initiate the connection.

Add-On Note For Netsuite Connector :
The NetSuite Connector is now available in the Browse Connector list by default

Click the plus (+) icon to connect Netsuite Connector (After Continue Further Steps are same as for custom connector)

Step 5: Role Configuration and Authorization
- If you are logging in with an administrator or any other role, you will need to adjust it because access with an administrator role is not permitted. Please refer to the screenshot below.

- To confirm a successful connection, select the “F3 MCP Role That You Created”.

- The screenshots provided are for the desktop application setup.
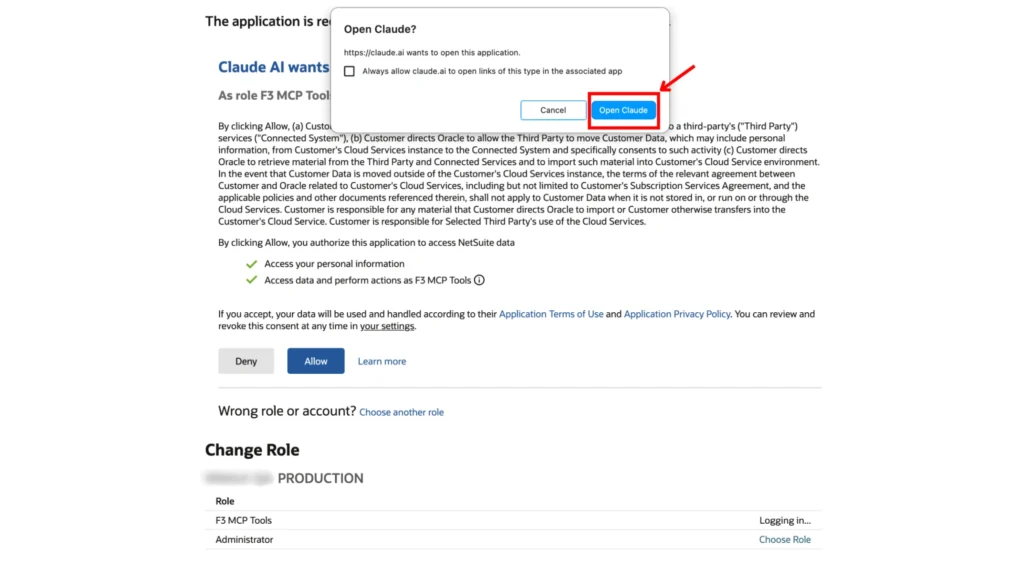
- For web-based cloud AI, a “Successfully Connected To <Account Name That You Added While Creating Connector>” toast message will appear after clicking the allow button.
Using Your NetSuite AI Connector
Step 6: Access Available Tools
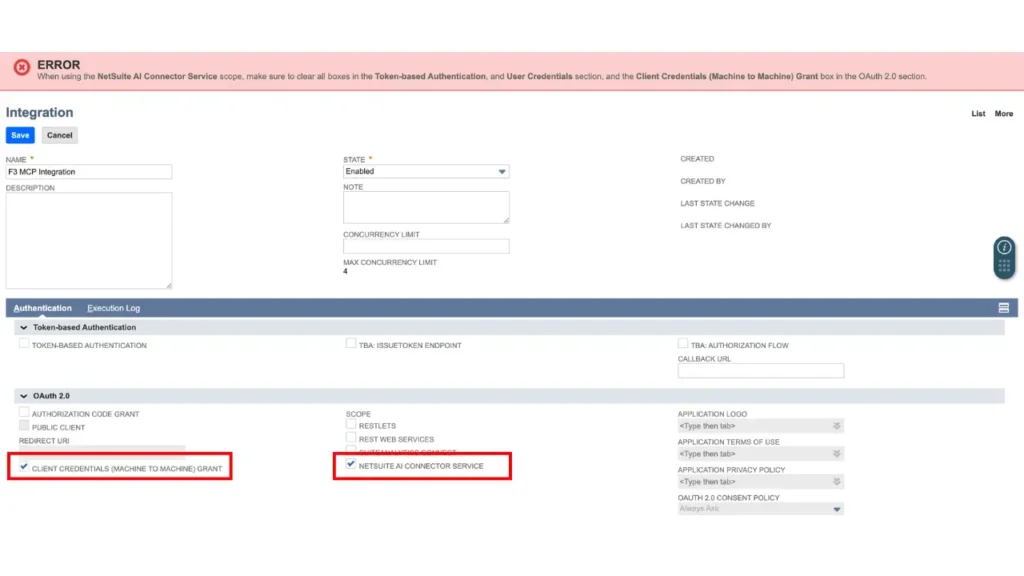
- Once the connection is established, a “Claude AI” integration record will be automatically created in NetSuite. This record is read-only and cannot be modified – including settings like Redirect URL, Scopes, Client Credentials, etc., for the integrity and security of the integration configuration.

Creating a custom integration using Client Credentials and the NetSuite AI Connector Service will result in an error, as this functionality is currently not supported.
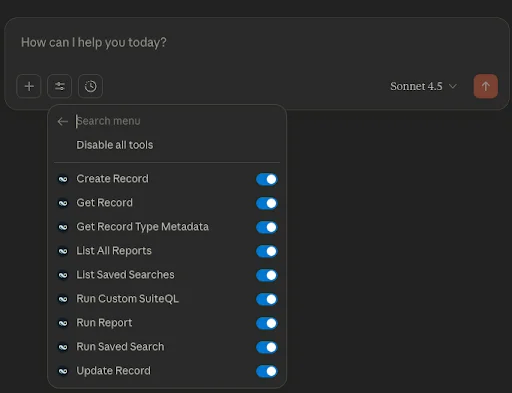
You’ll see a list of available tools based on the permissions configured for your custom MCP role.

As mentioned earlier, with the setup we have done with essential/bare minimum permissions, the user will see all 13 NS MCP Tools exposed by the MCP Tools SuiteApp.

Add ON: Once you have successfully connected the Netsuite AI Connector using the “Browse Connectors” option, the following permissions will be visible.

Tools available in the New Chat feature, originating from the MCP Standard Tools SuiteApp.
Step 7: Interact with NetSuite (Examples
- Compose natural language prompts or queries
- The AI will interpret your requests and execute appropriate NetSuite operations.
Step 8: Review Results
- Analyze the returned data and responses
- Verify that the integration is functioning as expected
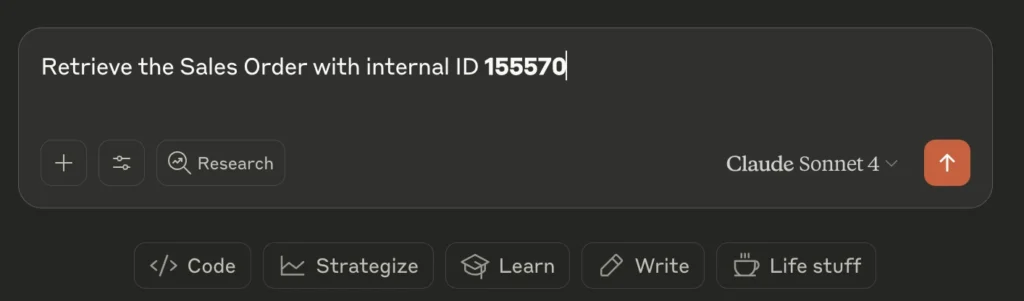
- Example 1: Get Transaction

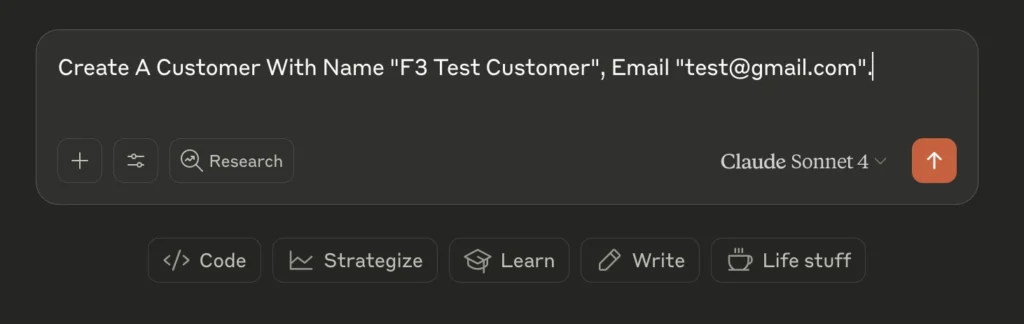
- Example 1: Create Entity

Conclusion
Congratulations! You’ve successfully set up the NetSuite AI Connector with Claude AI. This integration opens up powerful possibilities for AI-driven NetSuite operations, from data analysis to automated workflows.What’s Next? Stay tuned!
Need help with your NetSuite AI integration? Feel free to reach out for additional support and guidance.