To integrate any other system like NetSuite with Salesforce we need to create a connected app.
Following are the essential steps to create a Connected App in Salesforce for integration.After logging into your Salesforce account, click on the Gear Icon in the top right corner and Select Setup.

On the right side panel in the Platform Tools section, go to App > App Manager and click on New Connected App.

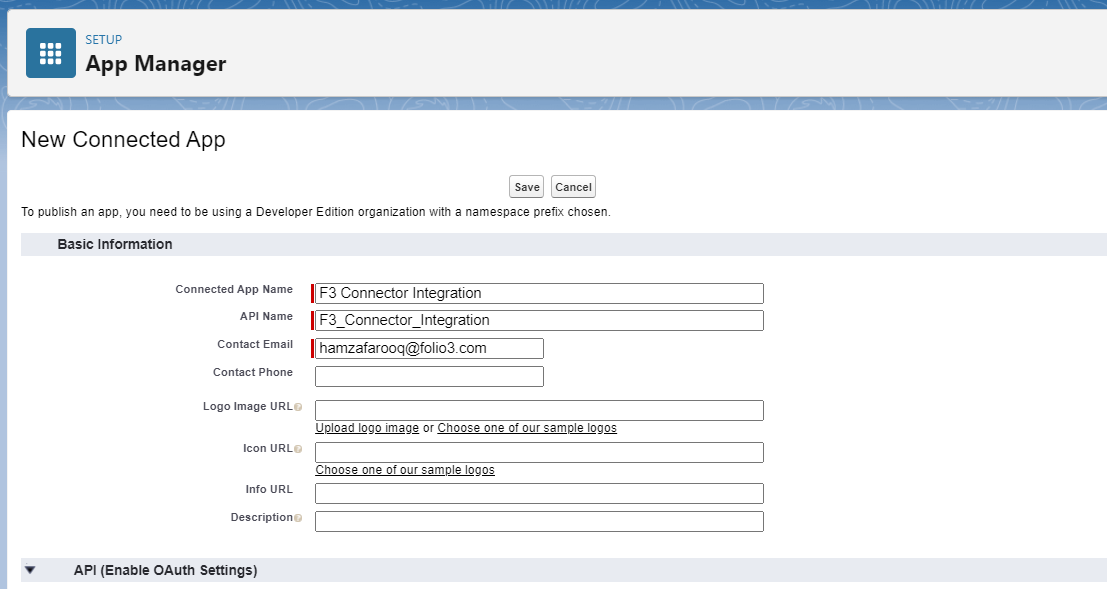
On the New Connected App page, fill in the Basic Information form:
- Connected App Name. For example, F3 Connector Integration.
- API name. For example, F3 Connector Integration.
- Contact Email.
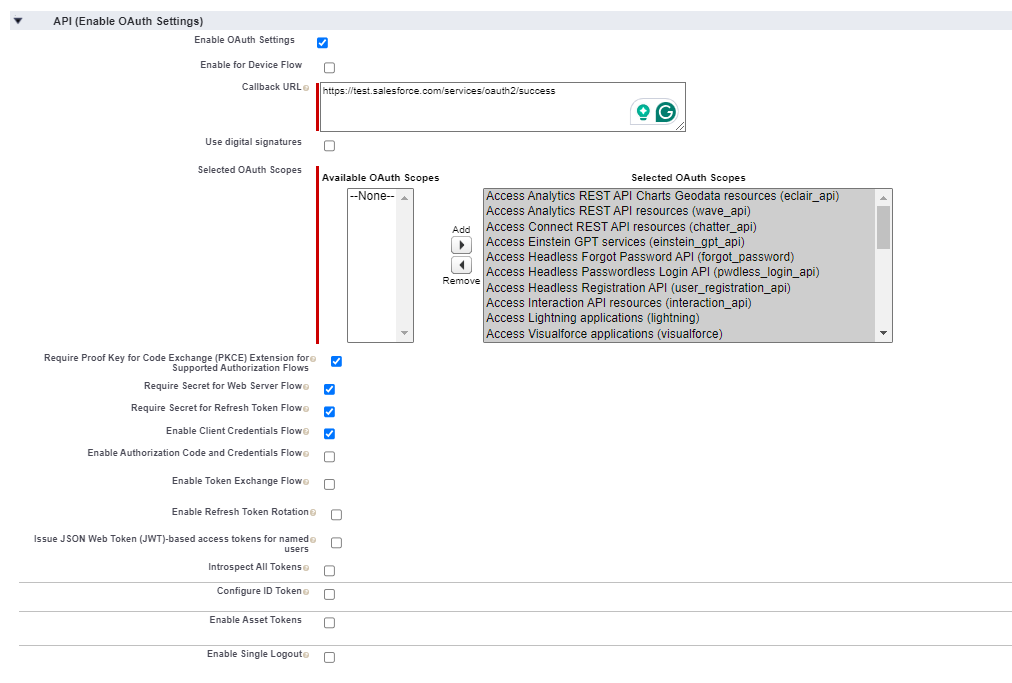
In the API(Enable OAuth Settings) section, mark Enable OAuth Settings as checked.
- In the Callback URL field, enter https://login.salesforce.com/services/oauth2/success.
- In the Selected OAuth Scopes field, select OAuth Scopes as per your need and then click Add.
Now click on the Save button.
We will get the following message, click on Continue:
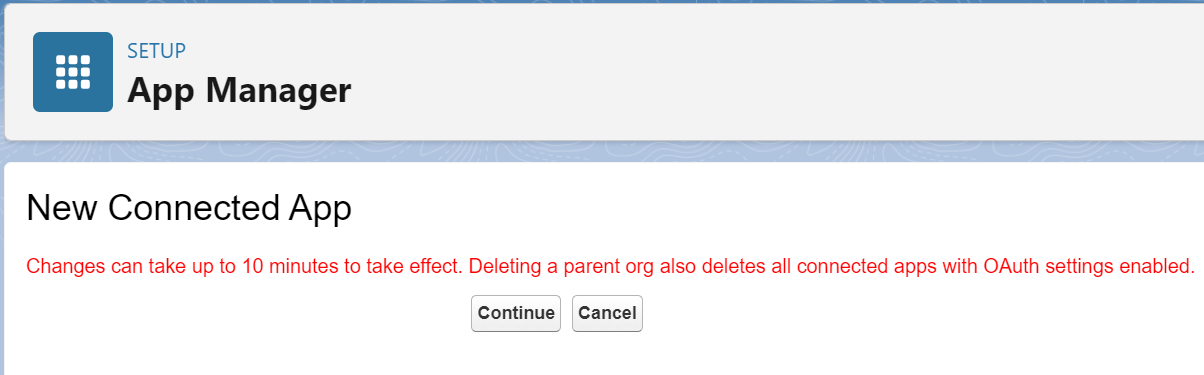
(Note: It means that if you delete a parent org, all child apps will also be deleted. However, if you are not deleting anything, this message is not relevant to you.)
Open the app again and under API (Enable OAuth Settings), click on Manage Consumer Details.

In case you are asked for verification, use the verification code received in your email to verify.
After that, a page will open containing Consumer Details. Copy the Consumer Key and Consumer Secret in a safe place, which will be used later on.
Finally, go to the App Manager again, find the App that you just created, and then click Manage.
- Here click the Edit Policies button.

In OAuth policies, select All users may self-authorize in the Permitted Users list, and configure IP Relaxation as per your business requirement then click the Save button.

Congratulations, the Connected app has been created for integration. Use the following API call to obtain an access token to perform your operations. (For headers, Content-Type is application/x-www-form-urlencoded)